A lot of people ask me about my construction methods. I am always a bit hesitant to describe them. My puppet building techniques are a strange hodge-podge of things I found in books, tricks other puppeteers have shown me and things that I apparently invented. oftentimes when I am working around other puppeteers, I will do something that seems to my mind to be the only logical solution or method of handling a material only to find those around me are astonished that anyone would use that method to get those results. This comes out of trial and error more than any attempt to be innovative. As a mostly self educated puppet builder, I'm not entirely sure where what I've figured out from just playing with materials ends and traditional established technique begins
I don't believe this is much different than any other puppeteer. To a certain extent I think we all build on what we know in our own way. In short, what I hope to demonstrate by this exercise is not how to build puppets, but how I built one particular puppet. This is intended as a demonstration rather than a tutorial. for all I know there are way better methods than mine. So far this is the best I've come up with.
Methodology:
In this demo I am building an old devil puppet for a video project I have in mind. The basic design will be a hand-and-rod puppet, similar in operation to "The Muppets", but hopefully quite different in overall effect. I know basically what I want, but I don't ordinarily work from a sketch so the process stays fresh and I allow myself to be open to discoveries. To make this post, each time I added something new, I would stop and photograph what I had just done. I edited out some of the smaller steps for brevity's sake. I will describe my methods and thought process at each photo. Hopefully the cumulative effect will be a relatively step-by-step document of the creation of this piece.
Materials:
-Wood, leather and fabric to make the mouth part
-A roll of 1" thick medium-firm compression poly-foam. (This is slightly denser than I ordinarily use. I thought I'd try a different compression. It woks fine.)
-Pair of very sharp scissors
-Hot glue gun with high quality hot glue
I have recently become extremely choosy about the blend of hot glue stick that I use. Good hot glue makes a world of difference! You spend a lot less time clamping and swearing. It is more expensive to buy the really good stuff but you use less of it. I order mine online. The stuff you find at the craft stores is practically useless.
I'm starting with the mouth blank as my base. This is simply two pieces of thin wooden board shaped and jointed with leather. The straps are also leather I may later replace them with wide elastic strips
I took a small sheet of foam and glued it to the curved edge of the lower "jaw" I want this character to have a pointy chin with a big beard, so I left it bigger than I ordinarily would.
I did the same with the top half. Note that I didn't glue my edges flush, but left a little space in the mouth. That way, if I decide to add teeth later, I'll have room
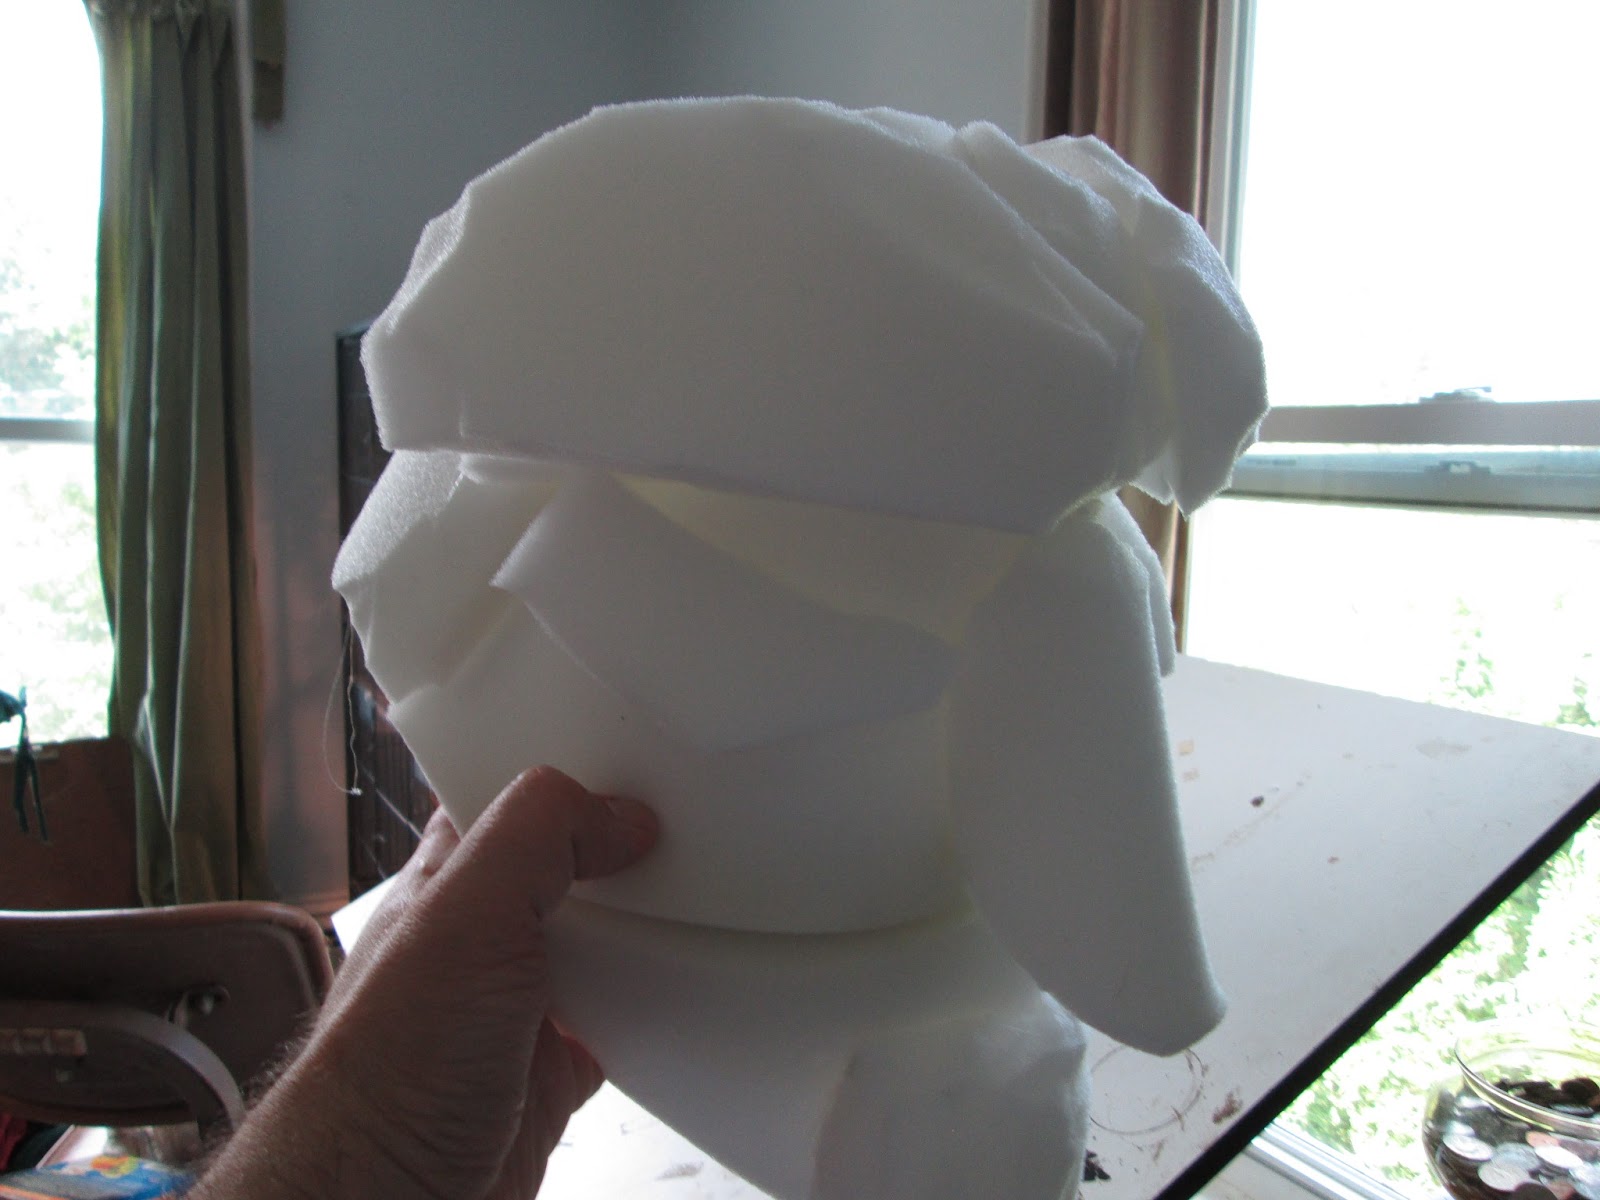
Here I rounded the top of the head by gluing the top edges together and created a curve to the front of the skull.
I added another piece to create the back of the head.
I wanted the chin to stick out farther to create the character and play up the slight natural under-bite that the puppet already has, so I added another block. Later I will realize that this block is a bit crooked. I will partially correct for that, and decide that I like it slightly askew.
Here is a closer look at the chin after I've shaped it a bit more by carving it with scissors. I use this technique a lot as you'll see.
I folded the nose and shaped it before gluing it into place. I like to have the dominant features established first so that I can fit the rest of the face around them
Now I shape the forehead and brows by adding another piece. I also trim the top of the nose to play up the hooked appearence
I add the cheekbones at this stage. This establishes the eye sockets. The basic planes of the face have been set at this point.
I like to have a "test eye" on hand throughout the process. It gives me a better notion of the final appearance and lets me know if my focus is where I want it. Some of you might recognize this as the heron puppet's original eye. If I don't have a spare resin cast eye around, sometimes I'll draw a pupil on a ping pong ball.
Testing with the eye made me realize that my face was too thin, so I added another layer to the forehead...
...and more "meat to the sides of his face. I think he's starting to look like a grumpy old man now, but I want to play up the devil aspect. Time for horns and pointy ears.
I know immediately that the ears are longer than I want, but I wait until I can see them in relation to the other features
As I want an old devil, I decided that I wanted long, twisty horns like an old goat's ("Old Goat" by the way is a really fun image search!). To get the twist I wanted out of sheet foam, I had to be inventive.
Here is one of the horns in process. I pinched the tip together and glued it into place, then I folded the foam back over itself and glued it. The foam naturally wants to spring apart and pull loose. I'm clamping it in place here. This was probably my third attempt to set it. This procedure is time consuming, frustrating and a bit difficult. I heartily recommend against it.
I've trimmed back the ears and added a base to the horns here.
Adding the line of the naso-labial trough adds a slight sneer to the face and sets up the location of the nostrils
I decided to add a little hump to the bridge of the nose to make the hooked profile more dramatic
Next I add some nostrils by bending a thin strip into place on either side. I briefly toy with the idea of adding a sharper point to the tip of the nose before trimming the bridge and deciding I don't need it. Instead, I give him a lower lip to exaggerate the under-bite and make him have a natural scowl.
I add a strip to either side of his face to distinguish a stronger contour of the skull and add two blocks to the eyebrows. When I add hair (Hopefully long white fake fur or sheepskin, if I can find it) these will help establish the jutting set of the eyebrows.
I wanted my character to look more grandfatherly than sinister, so I added crow's feet and kept the curve of the eyelids soft.
This is where having the '"test eye" around really pays off
I added the folds of the ears at this point and a few wrinkles around the bottom lip. I may decide to add some ridges on the horns later, but for now, the last three pictures are the final results of this stage
Stay tuned for more!
-J


You ever see that video of Picasso painting? This is like that, While I like the end result, I liked it when you were halfway through it, too.
ReplyDelete